|
To build a wooden IOM shell you will need planks, typically of either Balsa
(lighter, weaker, easier to work, but will need glass
sheathing, probably inside and out) or Wester Red Cedar
(still best to glass sheath, but not essential and thinner
glass possible). For most people best to pay a specialist
for the planks, cutting your own is very tricky. Mine
were actually "Brazilian Cedar", very pretty,
but a little heavier than Western Red Cedar.
|
| |
|
 |
 |
.JPG) |
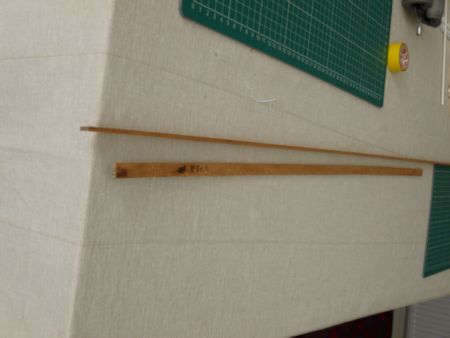
| Planks should be at least 1100
mm long, ideally 10 mm wide and 3 mm deep. Slightly thinner
(2.7mm) is better, but hard to obtain.
Make a method of holding the planks so you can plane them.
I used bits of old venetian blinds 3 mm apart, and deeper
in the middle secured to a flat 1.3 metre piece of wood, held
in my vice . |
|
I also hold the plank with one hand while
planing with the other hand. The small block plane works well
for me. Modellers planes also good. Planks tend to be narrow
at the front and back depending on boat shape, and angled
on one edge. |
 |
|
 |
| My building frame is a piece
of 1" MDF, about 1.3 metres * 400 mm. I have a very straight
line drawn down the centre of this to align the (shadows /
sections (just a name, same thing), and because I choose to
have frames every 50 mm I marked off lines at rt angles to
the centre line every 50 mm, starting at the transom. Some
just have shadows every 100 mm. For me I made the shadws from
6 mm plywood, cut on a bandsaw and finished with spokeshave.
All shadows were traced from a set of full sized plans (in
my case from Ian Vickers V8 design). All have a centre line
and in this case the chines are pen marked on them. All are
glued to a piece of 11/2" *1" and screwed to the
board so they are exactly in the right place (from the widest
point of the boat aft the back of the shadows are exactly
on the lines across the board, and from the widest point forwards
the front of the shadow is on the line across) are and the
centre line is vertical, so the boat is straight. It is possible
to get laser cut shadows, more accurate than I can do. |
|
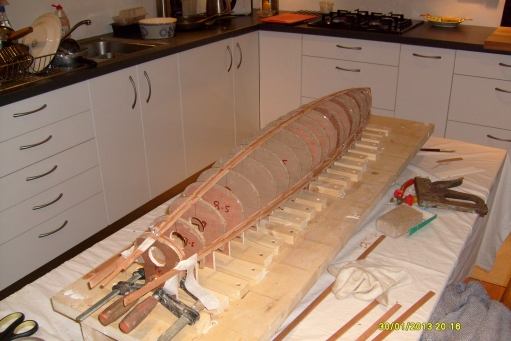
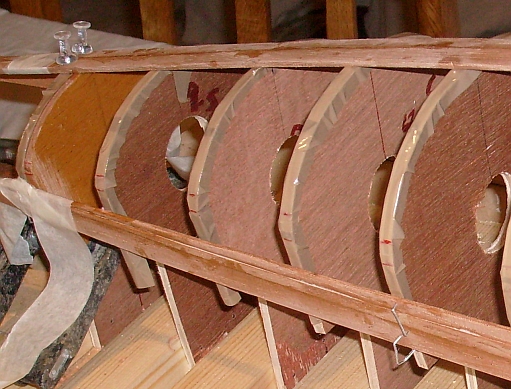
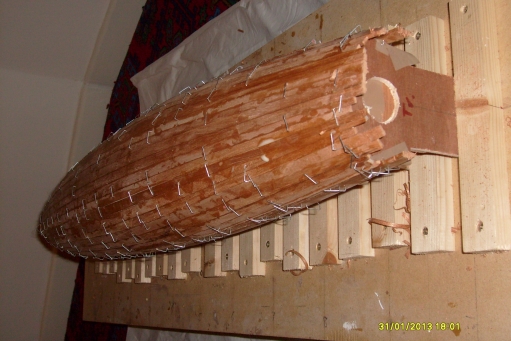
All shadows are covered in parcel tape where
the planks will touch en to stop they glueing to the shadows.
I started planking with 2 planks either side of the centre line,
so I have a perfect centre line for putting in keel case and
mast, frames etc. Planks are glued to each other, in my case
with "Titebond 111", a water resistant PVA. The bow
and transom shadows are a special case, where I have the actual
bow and transom in place, so no parcel tape, so the planks can
be glued to them. I also attached a false bow in front of the
real bow (see picture above) and a false transom behind the
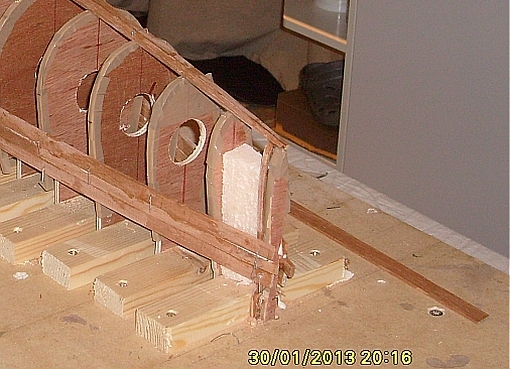
true transom to help make the planking easier. In the case of
the V8, the bow is very fine, so it needs extra support as shown
with the foam between shadow 0.5 and the bow. The bow, transom
and false bow and transom need a bit of shaping to let the plank
fit flat on the frames.
The next planks are on the gunwale line, helping steady the
boat sideways |
 |
|
 |
| I secured each plank with fine
staples or pins. This shell was actually a plug for a glass
fibre boat, so pin holes did not matter. With care, sticky
tape and small clamps and pins into the shadows but not throught
the plank you can glue each pair of planks without damaging
them. You will though only be able to work with 4 planks at
a time (2 on centre, 2 either side. Always work in pairs of
planks either side. |
|
Note that with the exception of the gunwale plank,
the planks are thinner at the transom and bow. No angles shaping
is needed on these planks as this boat has a slab sided topside,
whereas the centre line planks do need angled shaping. |
 |
|
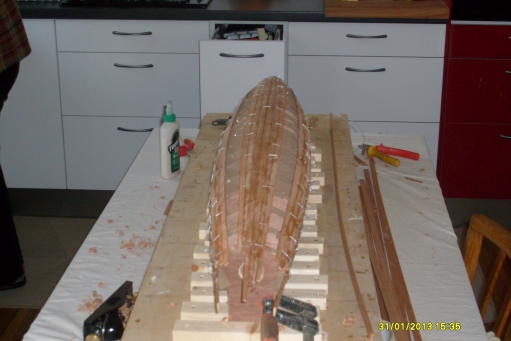 |
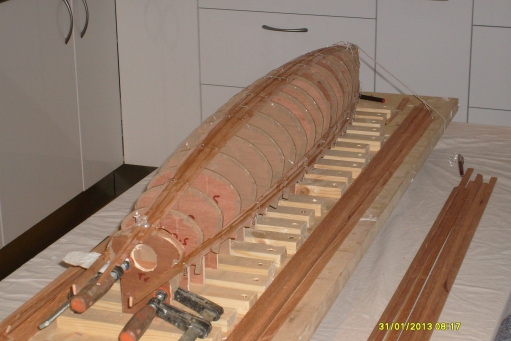
| With the bow being so fine, the planks
can easily pull the bow off centre, hence the string while glue
is setting. |
|
Note always working in pairs of planks. The
chine was a particular case where lots of angled shaping was
needed. I run all planks the full length, but this is not
necessary, and you can for example have a long scarf like
join at the chine. This will allow for less narrowing of the
planks. |
 |
|
 |
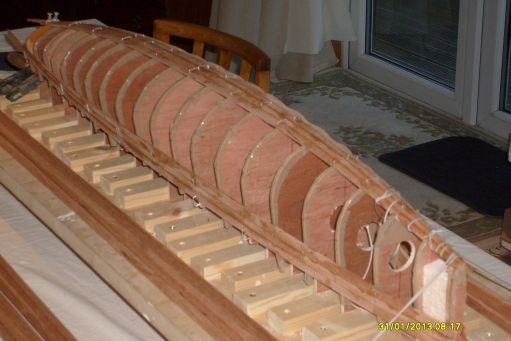
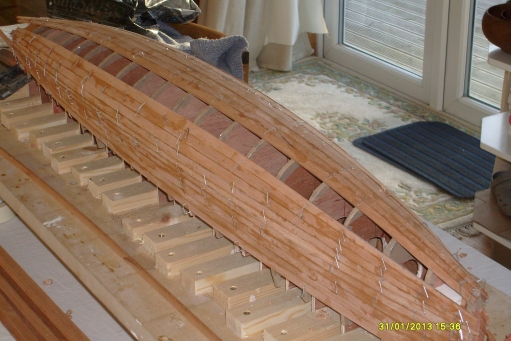
| Last 3 planks to go in each side. |
|
All planked up. Note the planks run beyonde
the bow and transom at this stage |
 |
|
|
| Time to pull out the staples. |
|
|
 |
|
 |
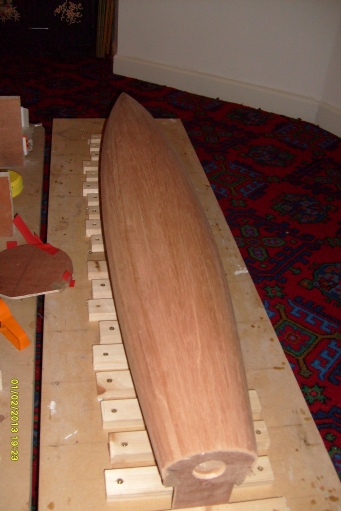
| Planks sanded with long board with
Aluminium oxide abrasive paper. Bow and transom trimmed off
(but still over sized because of the false bow and transom).
Note the pin holes are almost impossible to see and fill with
wood dust if you are lucky. |
|
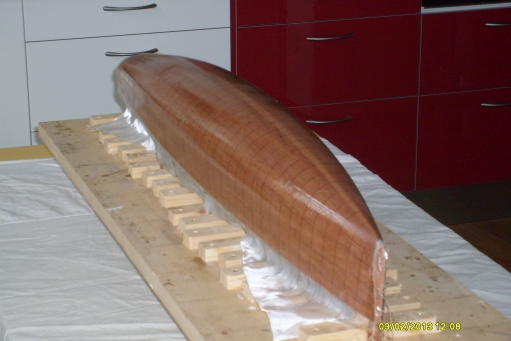
I epoxied and sheathed the shell with 40 gram
glass fibre for extra strength and protection. The stripes
you see above is in fact peel ply which is put on top of the
glass when wet. This helps soak up any excess resin. You later
pull that off, and it leaves a surface that you can sand easily
without damging the glass much, again sanding at least initially
with a long board. |
 |
|
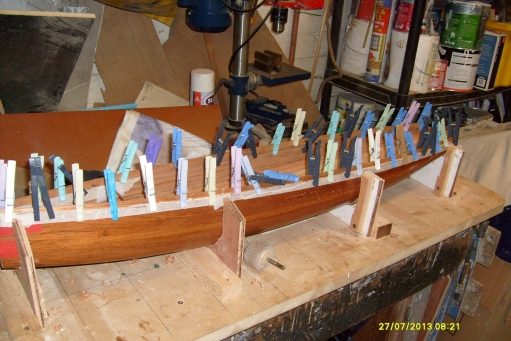 |
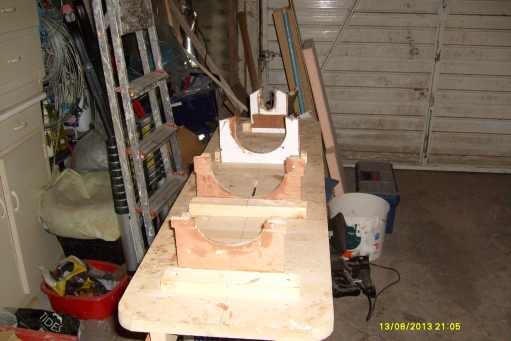
| I made this cradle (external set
of 4 frames cutout to to the outside shape of hte hull at specific
locations). This allows the boat to be placed in the cradle
and keep a comparatively accurate shape |
|
Undo the shadows from the board, remove each
shadow leaving just the bow and transom to help it keep an
accurate shape. Put at least one temporary bulkhead in place
roughly mid-length to stop the boat growing thinner and longer
(not show here). I then glued 2 planks (one either side) to
the inside of the gunwale, with the top a few millimetres
above the existing gunwale to help re-enforce the gunwale
allowing for hull to deck joint. I used clothes pegs as clamps. |
| |
|
Next page |