| |
| |
 |
|
 |
|

|
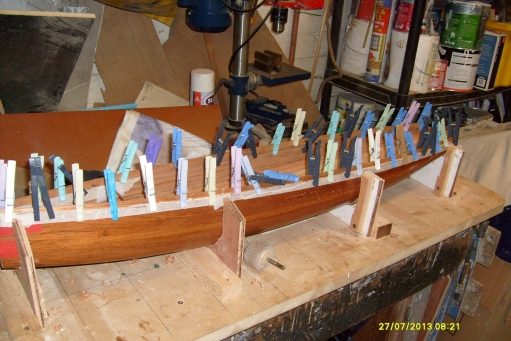
| A second inside gunwale strip (plank) is
added, again using clothes pegs as clamps. This was to
make a wider area for gluing decks onto, and to give more
strength in an area most likely to get hit. |
|
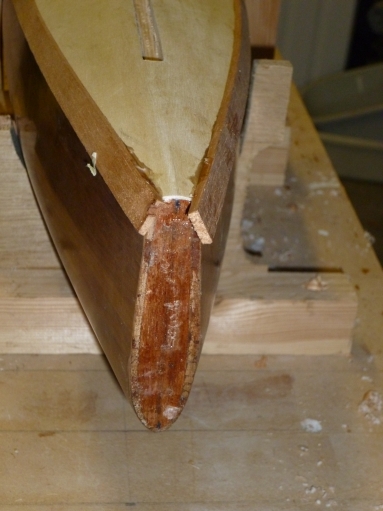
Bulkheads are added and glued
in place. In this case by a fillet radius of epoxy and
thickening powder. Also the boat was coated with epoxy
inside. You can use epoxy and glass. The bow is held in
place temporarily by the ply "triangle" with
is glued to the bow of the boat so it cannot twist easily.
|
| Sorry,
photo of putting in centre case lost |
|
 |
| |
|
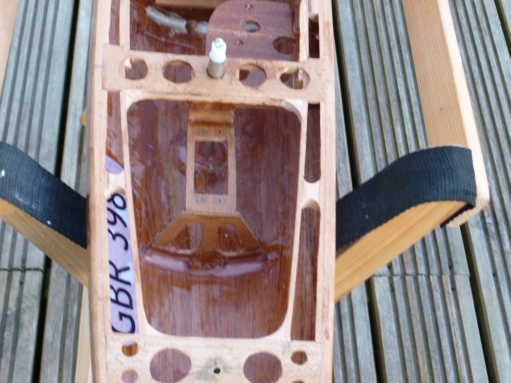
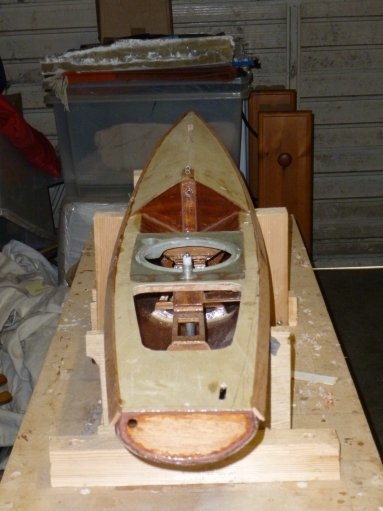
The centrecase / mast tube
has been added, in this case a David Creed one off GRP
one, and then extra bulkheads were added to support the
case. The hull is locally strengthed with about 25 mm
of GRP going under the main bulkheads and roudn the hull
(i.e. in high stress aread). |
| 
|
|
 |
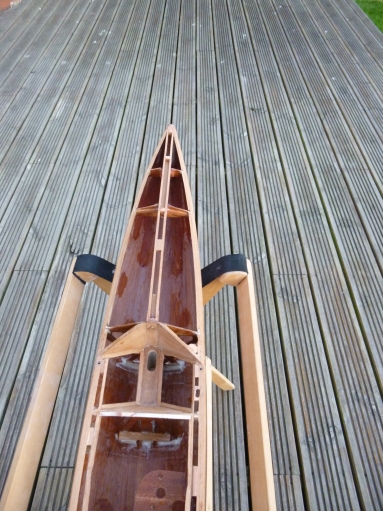
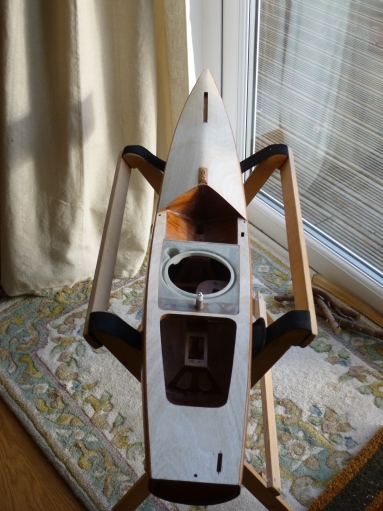
| Detail of centre case and mast
tube shown above. The "King plank" is shown
that supports the foredeck. In this case 2 pieces of planking
are separated by spacers to the width of a jib track channel. |
|
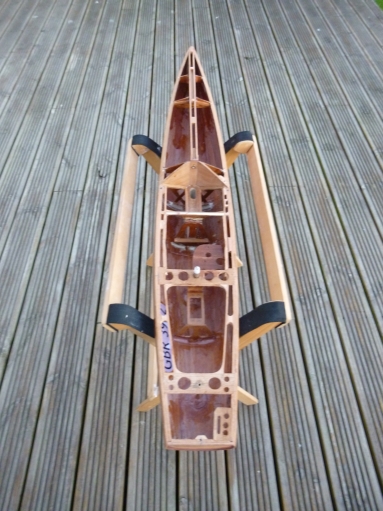
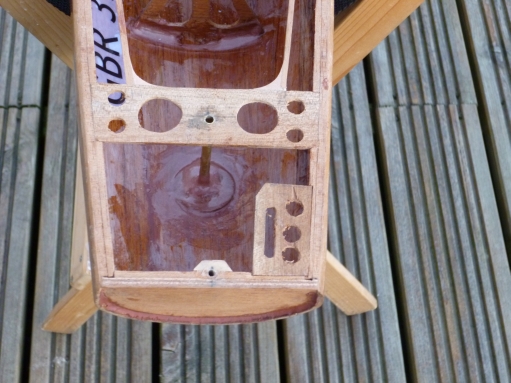
Platforms for winch and rudder servo added,
along with boat number. Also stringers added to support
where deck patch will go, as well as preparing for a well
for the mast |
 |
|
|
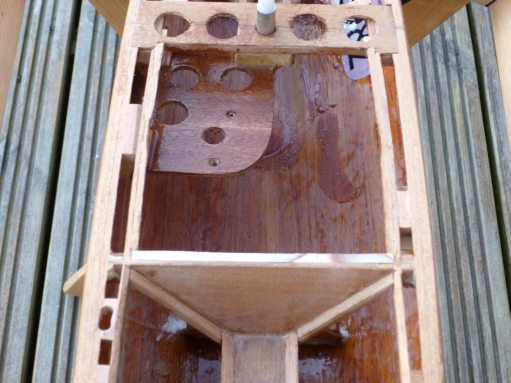
| Detail of area around mast
well. Note I have also prepared for fitting a Creedy deck
hatch (GRP with plastic lid) |
|
Winch support platform and mainsheet post
in place |
 |
|
|
| Rudder servo platform detail |
|
Rudder stock tube glued in. Not visible
here , but the brass tube is cut off so the tiller arm
can be clamped under the re-enforcing at deck level. There
is also a brass tube acting as a top bearing here. |
| 
|
|
 |
| Jib channel detail shown |
|
Further jib channel detail |
 |
|
|
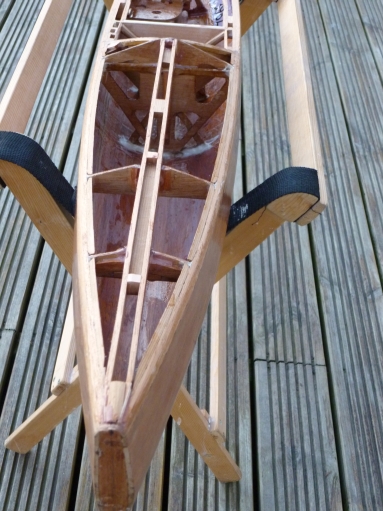
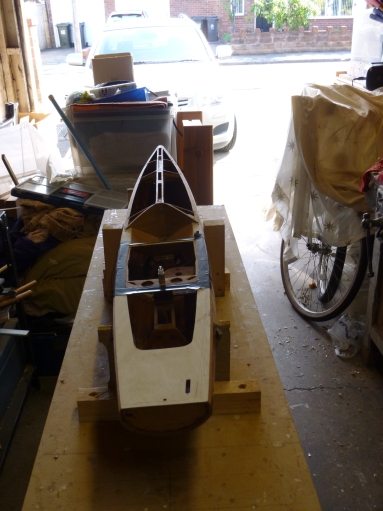
| Ready for decking except the
sides of the mast well not glued in yet. All re-enforcing
for shrouds, backstay and jib swivel channel are in place,
and captive nuts are put in place so that you can just
screw in the chain plate machine screws etc. In the case
of the foredeck, there is no access once the deck is on,
so any nuts have to be in place and captive, or one will
have to cut into the foredeck. All bare wood needs coating
with epoxy or paint or varnish to protect from water damage,
except for mating surfaces with the decks. |
|
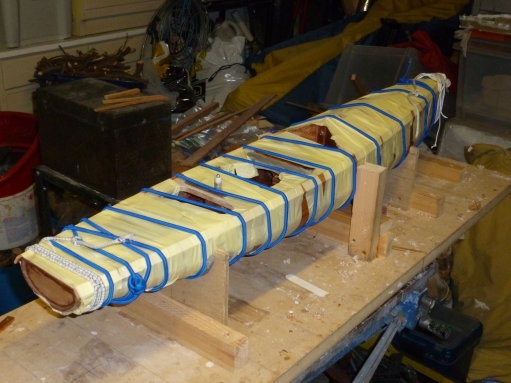
Mast well sides glued in, stern deck in
0.8mm ply glued on. The black tape is preparation to fixing
the Creed GRP hatch. The underside of the plywood needs
coating, ideally with epoxy just before gluing with epoxy.
If painting, do not paint on the bits that are to be glued.
You could alsouse glues such a Titebond 111 or Gorilla,
although Epoxy with thickners is very forgiving on any
unintentional gaps. |
 |
|
|
| Foredeck glued in place. Note
before gluing, the foredeck was prepared several days
in advance by bending over a tube down the centre while
wet, then left to dry and take suitable shape. Also note
the GRP deck hatch is now glued in place, as are the external
gunwales |
|
Showing gunwales being glued in place,
after all decks are one, held by elastic and masking tape.
This is quite hard to do well, and it would be easier
to just glue the deck flat onto the gunwale, and have
the plywood edge showing at the gunwale. |
 |
|
 |
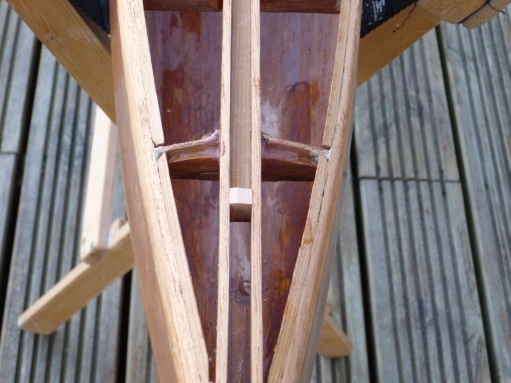
| Showing how gunwale is glued
on at an angle. It is later faired in and rounded |
|
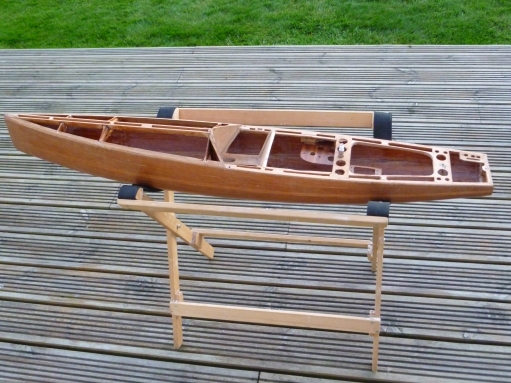
Gunwales rounded, decks sanded (be carefull,
veneer is very thin) |
 |
|
|
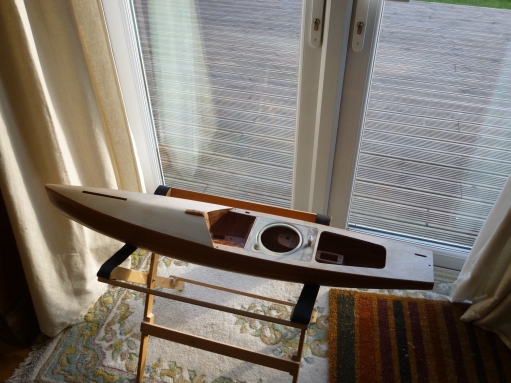
| Boat ready to be varnished. |
|
Next
page |