|
|
|
| |
|
|
|
|
| |
 |
|
 |
|
| |
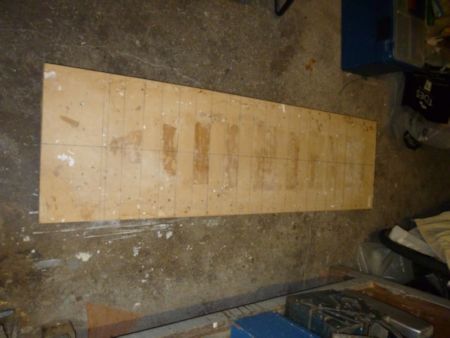
Draw out paper copies of the sections, removing
just under 1mm for the thickness of glass. Black felt tip
round the edge of the paper sections. I used sections every
50 mm. (e.g. Tr, 0.5, 1, 1.5 etc). It will depend on the plans
you have. Buy your foam, in my case 50mm thick, you can get
high density blue or pink sytene foam, and stick the paper
onto the foam using white PVA glue, so the black felt tip
is visible still. When dry, cut out the foam sections (shadows)
using a coping or band saw, or equivalent. Cut slightly oversize,
and using a sanding board, sand down to the paper.
Be warned, the foam will disolve in polyester resin, so you
need to use epoxy resin for with no solvent.
|
|
Prepare a baseboard, compeletely flat, not
flexible, and at least 50 mm wider than the widest part of
your boat, and longer than your boat, so here about 1200 *
300. I used 25mm MDF (medium density board), and glued 2 re-enforcing
strips underneath to keep the board flexing.
Draw a centre line using a staight edge (a large spirit level
is usually staight) the whole length of the board, and mark
off 50 mm gaps. Draw right angled lines to the centre line
at those 50mm intervals, and label them to match the sections.
Many use 100 mm foam, so you would only then use 100 mm gaps.
|
|
| |
 |
|
 |
|
| |
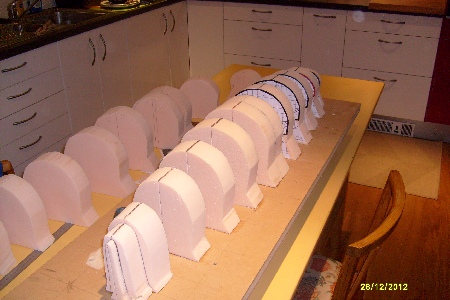
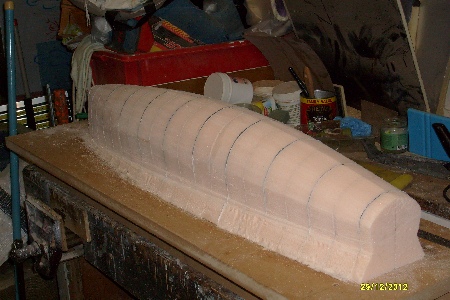
The shadows, e.g. Tr, 1, 2 etc are glued onto
the base board at appropriate lines on the board. I used UHU
por for this. But CAUTION: Only one edge (side) of each shadow
is accurate at this point. Working from the deepest part of
the boat, which will vary from design to design, but usually
around the middle of the boat, the paper side will be on the
line and facing aft in the back shadows, and facing forwards
and facing forwards in the shadows in front of the deepest section.
Hence there being 2 shadows joined at around the middle of the
boat in the photo above
Make sure the centre of each section is on the centre line of
the board, and check each shadow with a set square to make sure
its centre line is at right angles to the base board. If not,
adjust. |
|
I then filled in the missing shadows, glueing
them in place with white PVA glue which gives plenty of time
to adjust. I did though get a surprise when I realised that
I would have to sand a small amount of each 50mm shadow (so
more like 49 mm), as the paper glued onto the foam had made
the shadow thicker by nearly a mm. Be sure to get the centre
lines all lining up, as shown above, and use your eye to check
for any obvious errors.
I had put an extra amount of foam at bow and transom of the
boat to make here overlength, as this helps when laying up.
I also used wedges at again at the bow and transom, pushing
against a G cramp, to make sure all the sections are firmly
glued. Leave overnight for PVA to set.
|
|
| |
|
|
 |
|
| |
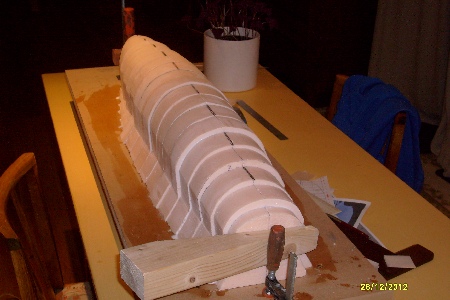
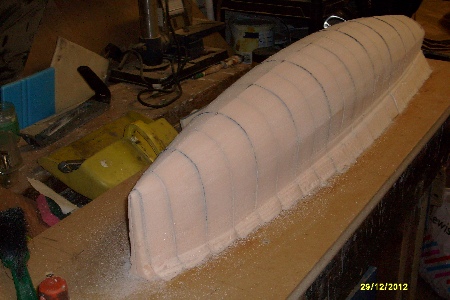
Long board used to shape the foam. yopu can also
use a piece of wood (about 400mm * 50mm * 15mm) with a long
piece of aluminium oxide paper on it. |
|
Using the long board with about 60 grit aluminium
oxide paper, rough sand down to just above the paper. The black
flet-tipped paper helps here, and the glued paper is surprisingly
solid. That said, in an effort to get it fair and equal both
sides, I took off too much foam (+ paper). It ony takes one
of two strokes! I regreted that as it took me a load of filler
to get things back to plan. The foam from the gunwall to the
base board slopes out to make it more stable. |
|
| |
 |
|
 |
|
| |
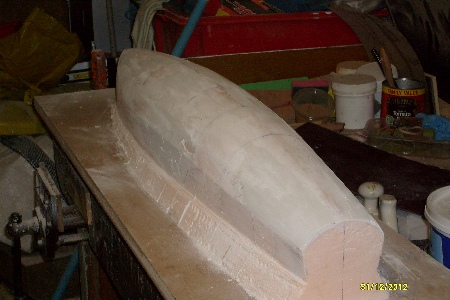
Fine sand with a finer grade of aluminium
oxide paper, again on a long board.
At this stage, you can either fill with plaster and paint
with emulsion as I have shown after this, or alternatively
you can glass fibre / epoxy resin then fill and polish, as
shown in Brad
Gibson's excellent Youtube video |
|
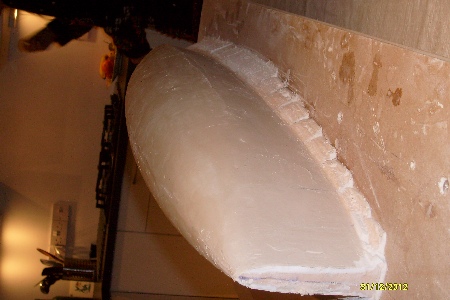
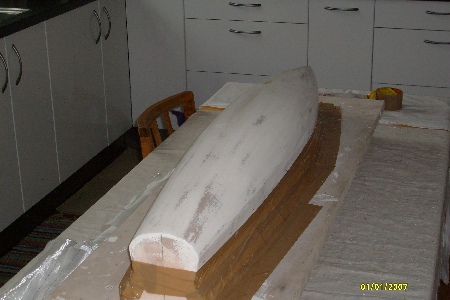
Fill with plaser. I tried several different fillers
I had around the house, such as car polyester filler (big mistake,
too hard and eats into foam), soft wall filler, (too soft, and
did not stick well), but the best for me was a high quality
ceiling plaster, in my case it was Artex (in UK), but others
will do. Let it dry overnight at least, then sand again with
the long board. |
|
| |
 |
|
 |
|
| |
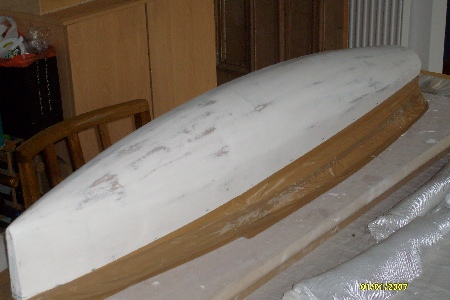
Paint will ordinary household emulsion paint.
I tried several different ones from my selection that I have
accumulated in my garage, and annoyingly the more expensive
ones covered and worked best |
|
You then fill, let dry, sand, paint lots of times till
your plug is fair, hopefully the shape you want, and smooth.
I don't like to admit how many times I did the cycle, had
I not been so enthusiastic with the long board initially,
I would have had less work.
You could used thinish plywood shadows and fill with foam
between, and that might give better results, but I've not
tried that. You can even build your plug in wood. I tried
that later - the technique is similar to building a wooden
boat. For me that gavr better results. |
|
| |
 |
|
 |
|
| |
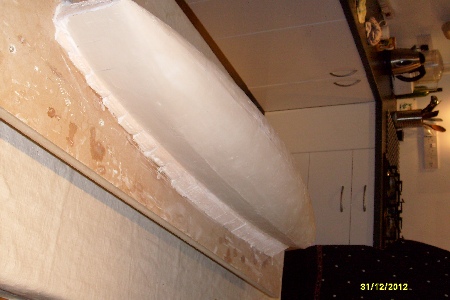
When finally happy with the plug, you need to
make sure the glass will not stick to it, i.e. a releasing agent
of some form. I used parcel tape above the gunwalls (shown),
and shrink wrap film around the main boat, which I taped to
the existing parcel tape with more parcel tape. Some use parcel
tape all over. The shrink wrap did not completely work as it
left too many "mini rucks" that showed in the glass,
though both released well. |
|
Some use thin latex sheet stretched over the
hull, but in that case you will need to have the part nearest
the base board (i.e. above the gunwalls) narrower than the
rest of the boat so it can be secured to the base board.
Others will use releasing wax and / or PVA release agent
(Poly Vinyl Alcohol, not white PVA glue - same letters different
product).
|
|
| |
|
|
Next
Page |
|
|
|