|
|
|
|
Producing the Deck and Glassing the shell / deck
|
| Having built
my boats, I then discovered by chatting to Dave Creed a better
way to join the deck to the hull. Other members of the club
(Roger & Garvin) have since used this technique to make
their boats, so some of the photos below are of their boats
or some of Dave Creeds as well as my own, and are 3 different
designs, but the principle is the same. The technique basically
involves wraping the glass fibre round the hull and over onto
the deck. One then has to spring off the glass, which is only
possibly as the lay up is comparatively light and flexible. |
| |
|
|
 |
|
| |
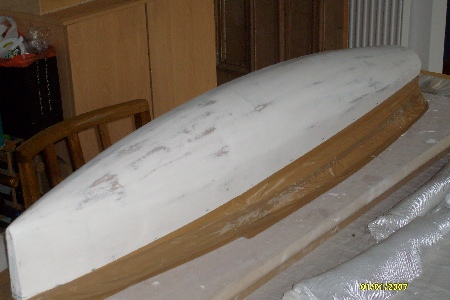
Mark the sheer line
on the plug - it should already be visible at each station.
Line is not yet completed, but is the blue dashes |
|
Saw this off using
a woodworking saw, a bit above the sheer line - now marked
in red
Sand down to the sheer line |
|
| |
 |
|
 |
|
| |
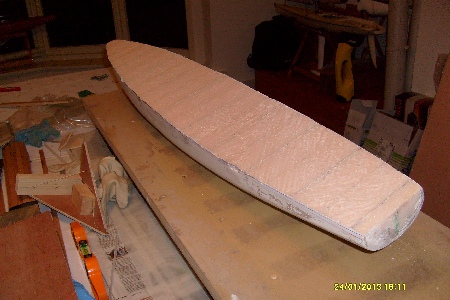
Add foam to the foredeck
in the same way as the hull was made, shape and fair. When
satisfied, you can either, as it this boat glass the whole
boat using epoxy resin (polyester resin melts the foam) and
glass to make the plug solid, then sand and smooth till a
really good finish is achieved.
or alternatively paint with emulsion, filling with fine plaster
and sand, repeat if necessary.
Any wells, holes for pots etc need to be done at this stage,
here built into the foam of the plug |
|
A quick alternative to
glassing or painting is to cover with strips of parcel tape,
which is an excellent releasing agent as well |
|
| |
 |
|
 |
|
| |
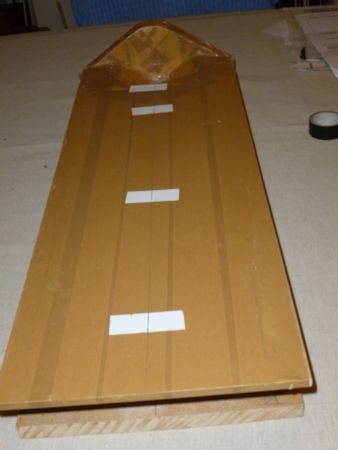
You could create a separate
stern deck & well, as shown above |
|
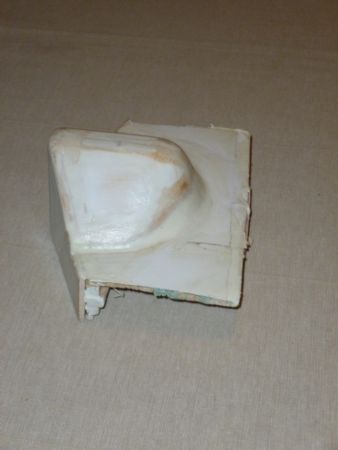
or just a well (this
one made of balsa, plaster and paint).
however you have finished the plug, it is a good idea to
wax if not using parcel tape, and perhaps use PVA releasing
fluid (not the glue, its a blue alcohol product). |
|
| |
Wrap Notes
by David Creed. It assumes you are using 2 layers of 200 gram
twill glass and epoxy resin, and your plug is ready to go:
Always cut full rectangles of material, never shape them
before laying down.If using the weave 45/45 after cutting
a generous rectangle at least 105cm by the width (including
wraping right round to the foredeck) plus 4cm. Tape the edges
with masking tape to avoid distortion. Peel ply should always
be used with the weave square in the normal way, not 45/45
because you need to tension it as it is laid over the laminate.
If using fast hardner mix enough resin for the first layer
only,about 110% of the weight of the piece of glass is about
right.
Start with a heavy coat of resin over the plug, as thick as
poss without too many runs. The idea is to have enough resin
on the plug to soak through the cloth by capillary action
driving the air out of the fibres. Don't rush at this time,
smooth the cloth down into contact with the plug using the
brush initially.
When the resin has soaked to the top of the cloth card (old
credit card) over the laminate to lay it down properly and
draw excess resin to the surface.
When the surface of the cloth is level add more resin if required
so that the surface is noticeably wet and lay the second layer
on following the same procedure.When this has wetted out and
has been lightly carded lay the peel ply down, again smoothing
on with the brush.Pull the ply out as taught as possible by
the corners then start pressing the ply down onto the laminate
with gloved fingers working from the middle in a herringbone
pattern forcing the ply to stretch along and around the hull.This
action will force any excess resin through to the top surface
of the ply. If any areas look dry add more resin on top of
the ply and it will be forced through by the fingering. No
creases should be evident after this process.
If wrapping around the deck edge do this after the hull area
is fully sorted,turn the boat the right way up with the hull
resting on foam blocks and work the wet laminate round the
corners. When done I would staple the peel ply to the deck
surface to ensure it stays tight whilst the laminate cures,
if not possible then tie or tape the edges together across
the deck.
When cured rip the ply off but don't try to release the plug.
Put a heavy coat of two pack paint down right away (I recommend
an high build epoxy) before any contamination gets onto the
laminate. It will look awful at this stage, rough and untidy.
Allow the paint to cure totally then rub down with 120 or
180 wet or dry until the surface is smooth.Rub off as much
paint as required to make smooth but stop when a speckled
pattern of glass and paint appears,this indicates you are
sanding the resin left by the peel ply pattern and if you
go any further you will cut into the fibres,not what we want!
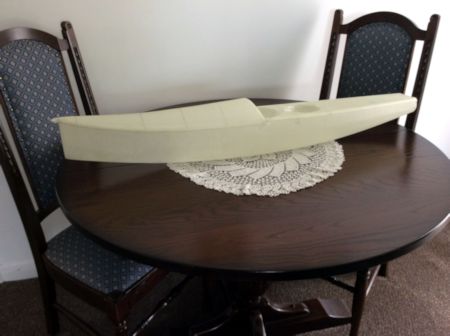
Now release the hull from the plug and build the boat without
any further finishing work until it is complete. Very little
filling should be required before the final coat, Epoxy +
light weight fillers or P38 or similar is fine for the detail
filling. |
|
| |
 |
|
 |
|
| |
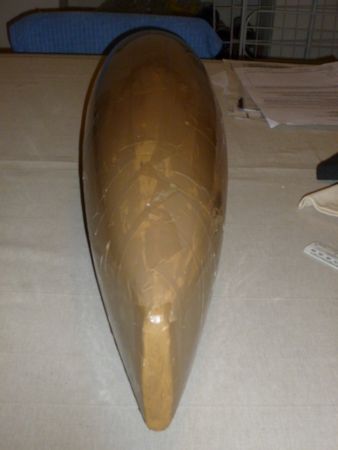
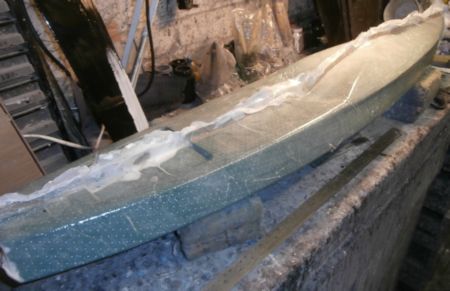
This shows a plug with
a "fence" down the centre line to allow a complete
wrap around and ultimately the deck could be just joined in
the centre. |
|
Glass has been wrapped
around here, there being no need to laminate a separate foredeck
here. |
|
| |
 |
|
 |
|
| |
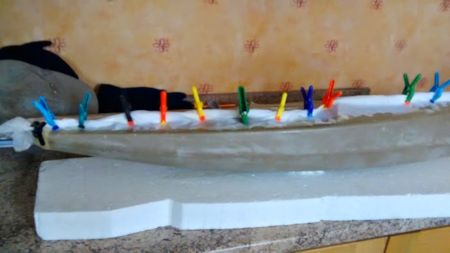
Different boat, but the
glass and peel play have been wrapped around and clamped in
the centre. |
|
In this boat the deck
part of this was trimmed back towards the gunwales as shown
opposite |
|
| |
 |
|
 |
|
| |
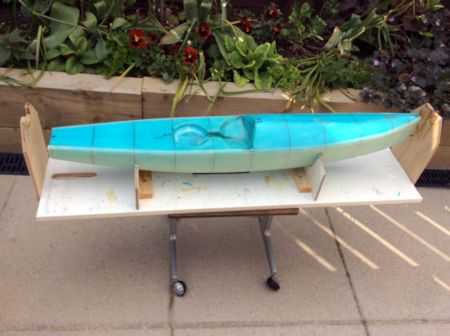
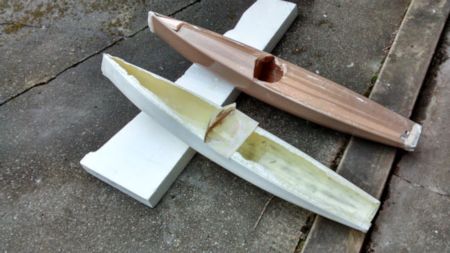
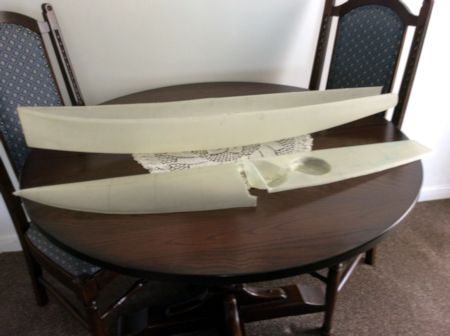
Here a separate foredeck
and stern deck including the well have been laminated |
|
The 3 parts placed together
to check all OK |
|
| |
|
|
next
page |
|
|
|